
This manual empowers users with comprehensive guides for troubleshooting and maintaining Babylock sewing machines․ It ensures confident repairs, emphasizing safety, clear diagrams, and precise instructions for success․
Understanding the manual enables sewers to resolve common issues effectively, fostering a deeper connection with their machines and enhancing sewing experiences through proper maintenance and care․
Overview of Babylock Sewing Machines
Babylock sewing machines are renowned for their durability, versatility, and innovative features, catering to both hobbyists and professional sewers․ Models like the BLE1, BL80B, and BLCS-2 offer advanced functionalities such as automatic threading, precision stitching, and coverstitch capabilities․ Designed with user-friendly interfaces, these machines simplify complex sewing tasks, ensuring high-quality results․ Babylock machines are built to handle a variety of fabrics and projects, from delicate embroidery to heavy-duty quilting․ Their robust construction and reliable performance make them a favorite among sewers worldwide․ Whether for home use or commercial purposes, Babylock sewing machines deliver exceptional craftsmanship and longevity, making them a worthwhile investment for any sewing enthusiast․
Importance of Regular Maintenance
Importance of Regular Maintenance
Regular maintenance is essential to ensure the optimal performance and longevity of Babylock sewing machines․ Proper care prevents mechanical issues, reduces the risk of costly repairs, and maintains stitching quality․ Cleaning the machine’s exterior and interior, lubricating moving parts, and checking for worn components are crucial steps․ Neglecting maintenance can lead to thread breakage, misaligned needles, and looper malfunctions․ By following a consistent maintenance routine, users can extend the lifespan of their machine, avoid unexpected breakdowns, and ensure seamless sewing experiences․ Regular upkeep also enhances the machine’s efficiency, making it easier to handle various fabrics and projects․ Prioritizing maintenance is a simple yet effective way to protect your investment and keep your Babylock sewing machine in peak condition for years to come․
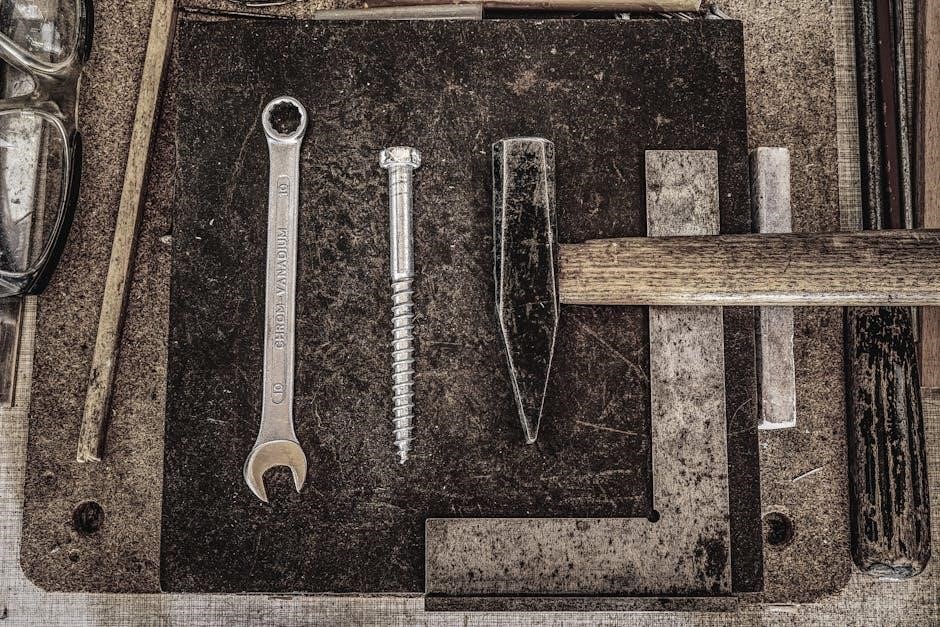
Basic Tools Required for Repair
For effective Babylock sewing machine repair, essential tools include a set of screwdrivers (Phillips and flathead), needle-nose pliers, and a small wrench․ Sewing machine oil is crucial for lubricating moving parts․ A soft brush or compressed air helps clean debris․ A specialized screwdriver or Allen wrench may be needed for specific components․ Tools for handling bobbins and needle plates are also necessary․ Always refer to the manufacturer’s guidelines to ensure using the correct tools, as specified in repair manuals․ Proper tools ensure safety and efficiency in maintaining and repairing your Babylock machine․
Safety Precautions for Repair
Always disconnect power before starting repairs․ Wear protective gloves and eyewear․ Avoid touching sharp parts and ensure proper grounding to prevent electrical shocks during maintenance․
General Safety Guidelines
Always prioritize safety when repairing your Babylock machine․ Ensure the power is disconnected before starting any repair to avoid electrical accidents․ Wear protective eyewear and gloves to prevent injuries from sharp parts or debris․ Never attempt repairs near water or in humid environments, as this increases the risk of electrical shock․ Keep loose clothing and long hair tied back to avoid entanglement with moving parts․ Properly ground the machine to prevent static electricity buildup․ Use only authorized tools and follow the manual’s instructions precisely․ Avoid touching internal components unnecessarily, especially sharp edges or points․ Store small parts securely to prevent loss or accidental ingestion․ Regularly inspect your workspace for hazards and ensure good ventilation․ By following these guidelines, you can ensure a safe and effective repair process․
Electrical Safety Considerations
When performing repairs on your Babylock machine, always unplug it from the power source to eliminate the risk of electrical shock․ Ensure the machine is fully powered down before starting any work․ Avoid touching electrical components with wet hands or while standing on a damp surface․ Use a multimeter to verify that no live circuits are present․ Never attempt to modify or bypass safety features, as this can lead to serious electrical hazards․ Ground the machine properly to prevent static electricity damage․ If unsure about any electrical procedure, consult the service manual or contact a certified technician․ Prioritizing electrical safety ensures a secure and effective repair process․
Handling Sharp Objects and Parts
When working on your Babylock machine, exercise extreme caution with sharp components like needles, presser feet, and loopers․ Always handle these parts with gloved hands or use tweezers to avoid cuts․ Ensure needles are securely fastened before operation to prevent accidental detachment․ Store sharp objects in protective cases when not in use․ If a needle breaks, carefully remove fragments using pliers to avoid injury․ Never force parts into place, as this may cause damage or create sharp edges․ Use a needle bar guard if available to protect yourself during repairs․ Dispose of broken or worn parts responsibly․ Proper handling of sharp objects ensures a safer working environment and prevents potential harm during the repair process․
Common Issues and Troubleshooting
Frequent problems include thread breakage, needle misalignment, and looper issues․ Check tension settings, align needles properly, and clean loopers regularly to resolve these common concerns effectively․
Thread Breakage and Tension Problems
Thread breakage and tension issues are common challenges in Babylock sergers․ Start by checking the thread path for tangles or blockages․ Ensure the tension dials are set correctly, as improper settings can cause uneven stitches or breakage․ Clean the machine’s interior, especially around the loopers and needle area, to remove lint or debris that might interfere with thread flow․ If issues persist, consult the service manual for specific tension adjustment procedures․ Replacing worn or damaged parts, such as the needle or looper, may also be necessary․ Regular maintenance and proper threading techniques can help prevent these problems, ensuring smooth operation and consistent stitching quality․
Needle Damage or Misalignment
Needle damage or misalignment is a frequent issue in Babylock machines․ Always inspect the needle for bends, burrs, or breakage, as these can cause poor stitching or fabric damage․ If misaligned, the needle may hit the needle plate or loopers, leading to machine malfunction․ To address this, first, disconnect the power and carefully remove the damaged needle․ Use the service manual to guide proper needle replacement and alignment․ Ensure the needle is securely fastened and aligned with the needle plate hole․ If the needle plate is worn or damaged, replace it to prevent further issues․ Regular inspection and proper maintenance can help avoid these problems, ensuring smooth stitching and optimal machine performance․
Loopers and Hook Issues
Loopers and hook issues are common in Babylock machines, often causing thread jams or uneven stitching․ Regularly inspect the loopers for damage or misalignment․ If damaged, replace them using the service manual’s guidance․ Adjust the loopers to ensure proper alignment with the hook; Clean lint and debris from the hook area to prevent interference․ If the hook timing is off, consult the manual for synchronization steps․ Lubricate moving parts to maintain smooth operation․ Replace worn or bent loopers to restore proper stitch formation․ Addressing these issues promptly prevents further damage and ensures consistent sewing performance․ Always refer to model-specific guides for precise instructions, as procedures may vary between Babylock models like the BLE1, BL80B, or BLCS-2․
Motor Malfunction or Noise
Motor malfunctions or unusual noises in Babylock machines can disrupt sewing operations․ Common causes include lint buildup, misaligned parts, or worn components․ To address this, first, unplug the machine to ensure safety․ Clean the motor area thoroughly, removing any debris or dust․ Check for loose screws or misaligned parts and tighten or adjust them as needed․ If the noise persists, inspect the motor brushes or bearings for wear and replace them if necessary․ Refer to the service manual for specific guidance, as procedures may vary by model․ Lubricating moving parts can also help reduce friction and noise․ Always ensure proper maintenance to prevent motor issues and maintain optimal performance․ Consulting the Baby Lock manual or contacting customer support can provide additional troubleshooting steps for complex cases․
Advanced Repair Techniques
Master advanced methods like replacing main PCBs, adjusting presser feet, and fixing chaining tongues․ These techniques ensure precise repairs and optimal machine performance for Babylock users․
Replacing the Main PCB Assembly
Replacing the main PCB assembly requires careful steps to ensure proper functionality․ Start by disconnecting the power and any wire connectors from the old PCB․ Use a screwdriver to remove the screws securing the PCB in place․ Gently lift the old PCB out and insert the new one, ensuring all connectors align correctly․ Reattach the screws and reconnect all wires as per the diagram․ Power on the machine to test if it operates correctly․ If issues persist, consult the service manual or contact Baby Lock support for assistance․ Proper grounding and anti-static precautions are essential to prevent damage to the new PCB during installation․
Adjusting the Presser Foot and Loopers
Adjusting the presser foot and loopers is crucial for ensuring proper stitch formation and machine performance․ Begin by loosening the presser foot screw and positioning it evenly․ For loopers, refer to the manual for specific measurements, as incorrect alignment can lead to uneven stitching․ Use a screwdriver to fine-tune the lower looper tip distance and ensure it aligns with the center of the shaft․ Test the machine by sewing a straight line on scrap fabric to verify proper tension and stitch quality․ If issues persist, consult the service manual for detailed diagrams or contact Baby Lock support for guidance․ Proper adjustment ensures smooth operation and prevents thread breakage or fabric damage during sewing․
Fixing the Chaining Tongue Position
Correcting the chaining tongue position is essential for smooth fabric handling and stitch quality․ First, consult the manual to locate the chaining tongue mechanism․ Gently adjust the position by turning the adjustment screw clockwise or counterclockwise․ Ensure it aligns with the specified gauge measurement, typically highlighted in the service manual․ After adjustment, test the machine by sewing a straight line to confirm proper chaining tongue alignment․ If issues remain, refer to the troubleshooting section or seek guidance from Baby Lock customer support․ Correct positioning ensures even fabric flow and prevents skipped stitches or uneven seams․ Regular checks and adjustments help maintain optimal machine performance and extend its lifespan․
Repairing the Needle Plate
Repairing the needle plate involves addressing wear or damage that can disrupt stitching․ Inspect for burrs or holes; smooth edges with a file or replace if severely damaged․ Ensure proper alignment during installation to maintain accurate needle positioning․ Refer to the service manual for specific torque settings and screw locations․ After replacement, test the machine by sewing a straight line to ensure smooth operation․ Regular maintenance prevents costly repairs and enhances stitching quality․ Always follow safety guidelines when handling sharp parts and electrical components to avoid injury or further damage․ Proper needle plate care is crucial for consistent performance and longevity of your Babylock machine․
Maintenance and Cleaning
Regular maintenance and cleaning are essential for optimal performance․ Clean the exterior and interior, lubricate moving parts, and check for worn components to ensure smooth operation and extend the Babylock sewing machine’s lifespan․
Cleaning the Machine Exterior and Interior
Regular cleaning is crucial for maintaining your Babylock sewing machine’s performance․ Use a soft, dry cloth to wipe the exterior, removing dust and debris․ For the interior, gently brush away lint and thread fragments from areas like the bobbin case and presser foot․ Avoid using harsh chemicals or wet cloths, as they may damage electrical components․ Use compressed air to clean hard-to-reach areas, ensuring no moisture is introduced․ Pay special attention to the needle plate and loopers, where buildup often occurs․ Clean after each project to prevent lint accumulation․ This routine upkeep helps maintain smooth operation and extends the machine’s lifespan․ Always refer to your Babylock manual for specific cleaning recommendations tailored to your model․
Lubricating Moving Parts
Lubricating moving parts is essential for maintaining your Babylock sewing machine’s smooth operation․ Use high-quality sewing machine oil to grease gears, shafts, and hinges․ Apply a few drops to pivot points and moving components, ensuring they are well-coated․ Avoid over-lubrication, as excess oil can attract dust and lint․ Use a small brush or cotton swab to apply oil precisely․ Regular lubrication prevents friction and wear, ensuring parts move freely․ Always refer to your Babylock manual for specific lubrication points and recommendations․ Lubricate every 50 hours of use or as needed․ Proper lubrication extends the machine’s lifespan and maintains optimal performance․ Keep the machine well-oiled to enjoy seamless stitching and trouble-free sewing experiences․ Regular maintenance ensures your Babylock remains in peak condition for years of reliable service․
Checking and Replacing Worn Parts
Regularly inspecting and replacing worn parts is crucial for maintaining your Babylock sewing machine’s performance․ Check components like the needle plate, loopers, and cutters for signs of wear or damage․ Use a screwdriver to remove damaged parts and replace them with manufacturer-approved replacements․ Refer to your service manual for specific instructions and diagrams․ Lubricate new parts before installation to ensure smooth operation․ Replace the needle plate if it is burred or has holes that are worn out․ Inspect loopers for alignment issues and adjust or replace them as needed․ For cutters, ensure they are sharp and properly aligned to prevent fabric tears․ Replace any worn-out gears or shafts to maintain precise stitching․ Regular inspections prevent breakdowns and ensure high-quality stitching․ Always follow the manual’s guidance for replacing parts to avoid further damage․ Replace parts every 100 hours of use or as recommended․ This proactive approach keeps your Babylock machine running efficiently and reliably for years․ Timely replacements prevent costly repairs and extend the machine’s lifespan․ By addressing worn parts promptly, you ensure consistent performance and maintain the integrity of your sewing projects․ Always prioritize using genuine Babylock parts for optimal results and durability․ Regular maintenance is key to sustaining your machine’s functionality and ensuring it continues to meet your sewing needs effectively․ Replace worn parts diligently to avoid unexpected issues and keep your Babylock in excellent working condition․ This attention to detail guarantees years of trouble-free sewing and embroidery․
Model-Specific Repair Guides
Find detailed repair instructions for Baby Lock models like BLE1, BL80B, and BLCS-2 in their respective service manuals, ensuring precise fixes tailored to each machine’s unique needs․
Baby Lock BLE1 Service Manual
The Baby Lock BLE1 service manual provides detailed instructions for troubleshooting, maintaining, and repairing the BLE1 serger․ It includes step-by-step guides for replacing the main PCB assembly, adjusting the presser foot, and aligning loopers․ The manual also covers common issues like thread breakage and tension problems, offering practical solutions․ Users can download the PDF manual, which contains diagrams and schematics to aid in repairs․ Safety guidelines are emphasized, such as disconnecting power before servicing․ This comprehensive guide is essential for both basic maintenance and advanced repairs, ensuring optimal performance of the Baby Lock BLE1․ It empowers users to confidently address issues, extending the machine’s lifespan and reliability․
Baby Lock BL80B Jubilant Machine Manual
The Baby Lock BL80B Jubilant Machine Manual is a comprehensive guide designed to assist users in understanding and maintaining their sewing machine․ It covers essential topics such as troubleshooting common issues, performing routine maintenance, and making necessary repairs․ The manual includes detailed instructions for replacing parts, adjusting settings, and resolving errors․ Users can find clear diagrams and step-by-step directions to ensure proper repair techniques․ Additionally, the manual emphasizes safety precautions to prevent accidents during repairs․ By following the guidelines outlined in the BL80B manual, users can extend the lifespan of their machine and maintain its optimal performance․ This resource is indispensable for anyone seeking to keep their Baby Lock BL80B in excellent working condition․
Baby Lock BLCS-2 Coverstitch Manual
The Baby Lock BLCS-2 Coverstitch Manual provides detailed instructions for the setup, operation, and maintenance of the BLCS-2 coverstitch machine․ It includes troubleshooting guides for common issues like thread breakage and tension problems․ The manual also offers step-by-step repair procedures for components such as the looper, needle, and presser foot․ Users can find diagrams and schematics to help identify parts and understand repair processes․ Additionally, the manual covers routine maintenance tasks, such as cleaning and lubricating moving parts, to ensure optimal performance․ By following the BLCS-2 manual, users can resolve errors, replace worn parts, and keep their machine in excellent condition․ This resource is essential for anyone looking to master the repair and upkeep of their Baby Lock BLCS-2 coverstitch machine․

Troubleshooting Common Errors
Identify and resolve issues like error codes, thread breakage, and needle misalignment․ Check tension settings, clear jams, and ensure proper machine calibration for smooth operation․
Understanding Error Codes and Alarms
Babylock machines display error codes to indicate specific issues, such as thread breakage, needle misalignment, or mechanical malfunctions․ These codes guide users to quick solutions, ensuring minimal downtime․ For example, “E001” often signals a thread cutter issue, while “E002” may indicate a problem with the needle position․ Referencing the service manual is crucial, as it provides detailed explanations and repair steps for each code․ Always check the manual before attempting repairs to avoid further damage․ Regular maintenance, like cleaning and lubricating, can prevent many errors․ If alarms persist, consult the troubleshooting section or contact Babylock support for professional assistance․ Understanding these codes empowers users to address problems confidently and efficiently․
Resolving Thread Cutter Issues
Thread cutter problems are common in Babylock machines and can often be resolved with simple troubleshooting․ First, check for thread jams or debris around the cutter, ensuring it’s clean and free from obstruction․ Lubricate moving parts if necessary․ If the cutter isn’t functioning, refer to the service manual for instructions on adjusting or replacing it․ Some models may require recalibrating the cutter mechanism after replacement․ Always disconnect power before performing repairs․ If issues persist, consult the error code section or contact Babylock support․ Regular maintenance, like cleaning and oiling, can prevent future problems․ Addressing thread cutter issues promptly ensures smooth sewing and prevents damage to the machine․
Fixing Bobbin and Tension Problems
Bobbin and tension issues are common in Babylock machines and can disrupt sewing․ Start by checking the bobbin for proper seating and thread flow․ Ensure the bobbin is correctly aligned and not overfilled, as this can cause uneven tension․ Adjust the top and bottom tension dials according to the manual’s guidelines․ If thread breaks frequently, inspect for frayed edges or debris in the tension discs․ Clean the area and rethread the machine․ For persistent issues, refer to the troubleshooting section or consult a service manual for specific model adjustments․ Regularly lubricating the bobbin area can prevent future problems․ Proper bobbin and tension maintenance ensures consistent stitch quality and smooth operation of your Babylock machine․

Resources for Repair
Downloading Service Manuals
Access official Babylock service manuals online for detailed repair guides, diagrams, and troubleshooting tips specific to your machine model․
Accessing Diagrams and Schematics
Download PDF files containing detailed diagrams and schematics to help visualize and execute complex repairs accurately and efficiently․
Contacting Baby Lock Customer Support
Reach out to Baby Lock’s customer support team for professional assistance, spare parts, and expert advice on resolving repair challenges․
Official Babylock service manuals are readily available online, offering detailed repair guides, diagrams, and troubleshooting tips․ These manuals cover various models, including the Baby Lock BLE1 and BLCS-2, ensuring comprehensive coverage for specific machine needs․ By downloading these resources, users gain access to step-by-step instructions for resolving common issues, replacing parts, and performing routine maintenance․ Trusted sources include the Baby Lock official website, authorized retailers, and verified third-party platforms․ Ensure authenticity by downloading from reputable sites to avoid incomplete or incorrect information․ These manuals are essential for confident repairs, providing clarity and precision for both novice and experienced users․ Regularly updated versions are available, reflecting the latest advancements in Babylock technology and repair techniques․
Diagrams and schematics are crucial for Babylock repair, providing visual guidance for complex procedures․ These resources are often included in service manuals or available separately on official Babylock websites․ Detailed diagrams illustrate components like the main PCB assembly, loopers, and presser feet, aiding in precise repairs․ Schematics outline electrical connections and mechanical systems, essential for diagnosing issues like motor malfunctions․ Users can download high-resolution PDF files, ensuring clarity for accurate repairs․ Reputable third-party platforms may also offer these resources, but verifying authenticity is key to avoid misinformation․ Accessing these visual tools empowers users to tackle advanced repairs confidently, ensuring machines function optimally․ Regular updates reflect the latest technical advancements, making them indispensable for effective maintenance․
Contacting Baby Lock customer support is essential for resolving complex issues or accessing specialized assistance․ Users can reach support through the official Baby Lock website, where contact forms, phone numbers, and email addresses are provided․ Additionally, live chat options may be available for immediate inquiries․ For technical issues, such as error codes or malfunctioning parts, support agents can guide users through diagnostic steps or recommend authorized service centers․ Registering your machine ensures warranty coverage and prioritized assistance․ Baby Lock also offers extensive online resources, including FAQs and downloadable manuals, to help users troubleshoot independently․ Reaching out to customer support ensures accurate solutions and maintains machine performance, fostering a positive sewing experience․
This manual has equipped you with essential repair and maintenance skills for Babylock machines․ By following the guidelines, you can ensure longevity and optimal performance of your sewing machine․
Regular maintenance is crucial for extending the life of your Babylock machine․ Start by cleaning the exterior and interior, ensuring all debris is removed․ Lubricate moving parts to prevent friction and wear․ Check for worn or damaged components, such as needles, loopers, and tension discs, and replace them as needed․ For common issues like thread breakage, inspect tension settings and ensure proper alignment․ Address needle damage by replacing or realigning it carefully․ When handling advanced repairs, refer to diagrams and service manuals for precise guidance․ Always prioritize safety, especially when working with electrical components or sharp parts․ By following these steps and staying proactive, you can resolve most issues effectively and keep your Babylock machine running smoothly․
Encouragement for Further Learning
Mastering your Babylock repair manual is just the beginning of your sewing journey․ Encourage yourself to explore advanced techniques and delve deeper into understanding your machine’s mechanics․ Utilize online resources, such as service manuals and tutorials, to expand your knowledge․ Practice diagnosing and resolving issues to build confidence in your skills․ Join sewing communities or forums to share experiences and gain insights from experienced users․ Continuous learning will not only enhance your sewing capabilities but also empower you to tackle complex projects with ease․ Embrace the process of growth and enjoy the satisfaction of maintaining and improving your Babylock machine independently․