
Trestle table plans PDFs provide comprehensive guides for crafting versatile and stylish tables, offering step-by-step instructions for DIY enthusiasts to create functional pieces with ease and precision․
1․1 What is a Trestle Table?
A trestle table is a type of table that features a unique support structure, typically consisting of two horizontal beams (trestles) connected by vertical legs or braces․ This design provides excellent stability and allows for a spacious, unobstructed area beneath the table top․ Trestle tables are often preferred for their versatility, as they can be used in various settings, from dining to workspaces․ Their minimalist yet sturdy construction makes them a popular choice for both traditional and modern interiors․ The design emphasizes functionality while offering opportunities for customization, making it a favorite among DIY enthusiasts and professional woodworkers alike․
1․2 Importance of Using PDF Plans for Trestle Tables
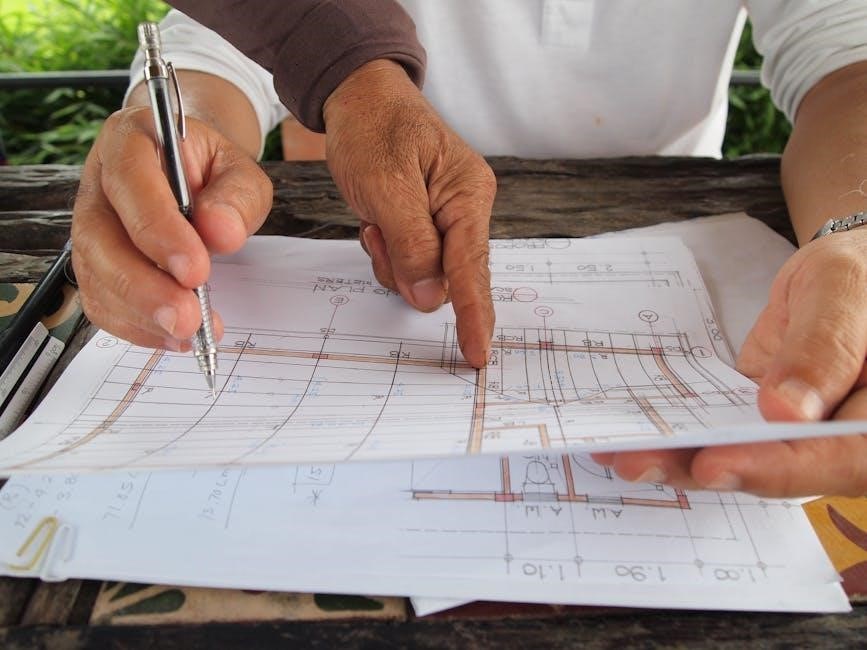
Using PDF plans for trestle tables is essential for ensuring accuracy and clarity in your DIY project․ These plans provide detailed, step-by-step instructions, measurements, and diagrams, making it easier to visualize and execute the build․ PDF formats are universally accessible and can be easily printed, allowing you to refer to them offline during construction․ They also offer a comprehensive overview of materials and tools needed, helping you prepare adequately․ Additionally, PDF plans are often downloadable, saving time and reducing the risk of errors․ By following these guides, you can achieve professional-quality results, even if you’re a beginner․ They are a valuable resource for anyone aiming to create a sturdy, functional, and aesthetically pleasing trestle table․
1․3 Benefits of DIY Trestle Table Projects
Engaging in DIY trestle table projects offers numerous benefits, including cost savings, customization, and a sense of accomplishment․ By building your own table, you can tailor the design, materials, and size to fit your specific needs and decor․ This allows for a personalized piece that reflects your style․ Additionally, DIY projects can be more budget-friendly compared to purchasing ready-made furniture․ The process also enhances your woodworking skills and provides a rewarding creative outlet․ Furthermore, DIY trestle tables are often built with durability in mind, ensuring a long-lasting piece for your home․ This hands-on approach fosters pride and satisfaction, making the finished product truly meaningful․
Finding the Best Trestle Table Plans PDF
Discover expert-designed trestle table plans PDFs online, offering detailed instructions, materials lists, and step-by-step guides for various styles and budgets, ensuring a successful DIY project․
2․1 Where to Find Free Trestle Table Plans Online
Free trestle table plans can be found on various DIY websites and platforms like Rogue Engineer, HowToSpecialist, and Instructables․ These sites offer step-by-step guides, PDF downloads, and video tutorials to help you build your own trestle table․ Popular platforms also include Ana White and The Spruce Crafts, which provide detailed blueprints and material lists․ Additionally, YouTube channels and forums like Reddit’s r/woodworking often share free plans and tips for constructing trestle tables․ For a rustic or modern design, websites like MyOutdoorPlans and FineWoodworking offer downloadable PDFs․ These resources cater to both beginners and experienced woodworkers, ensuring you find the perfect plan for your project․
2․2 Paid vs․ Free Trestle Table Plans: Which is Better?
When deciding between paid and free trestle table plans, consider your needs․ Free plans, available on sites like Rogue Engineer and HowToSpecialist, are great for simple designs and budget-friendly projects․ They often include basic instructions and material lists, ideal for DIY enthusiasts․ However, paid plans, typically found on platforms like Ana White or FineWoodworking, offer more detailed instructions, customizable options, and professional designs․ Paid plans are better for complex projects or unique styles, providing precise measurements and expert tips․ If you want a quick, easy build, free plans suffice․ For a high-quality, tailored piece, investing in paid plans is worthwhile․
2․3 Trusted Sources for Downloading Trestle Table Plans
Reputable websites like Rogue Engineer, HowToSpecialist, and Ana White offer high-quality trestle table plans․ These platforms provide detailed, step-by-step guides with precise measurements and material lists․ Rogue Engineer’s free DIY plans are popular for their clarity, while Ana White’s customizable designs cater to various skill levels․ FineWoodworking and similar sites offer expert-level plans with professional finishes․ Additionally, platforms like Etsy and eBay host unique, paid PDF plans from independent creators․ Always verify reviews and previews before downloading to ensure the plans meet your project needs and skill level․ These trusted sources guarantee accurate and reliable instructions for crafting durable trestle tables․

Tools and Materials Needed
Build a trestle table using essential tools like drills, saws, and sanders, along with materials such as 2×4 lumber, screws, wood glue, and wood finishes for durability․
3․1 Essential Tools for Building a Trestle Table
Building a trestle table requires a well-equipped toolkit․ Essential tools include a circular saw or hand saw for cutting lumber, a drill press or cordless drill for precise holes, and a sander for smoothing surfaces․ A tape measure ensures accurate cuts, while clamps help hold pieces in place during assembly․ A square is crucial for ensuring all corners are square, and a level guarantees the table is even․ Safety equipment like safety glasses and a dust mask should always be worn․ Additional tools like a miter saw, jigsaw, or impact driver can simplify the process, depending on the design complexity․ A workbench and vise provide stability for cutting and assembling components, making the project more manageable and efficient․
3․2 Materials Required for a Standard Trestle Table
A standard trestle table typically requires 4×4 lumber for the legs and support beams, ensuring stability and strength․ The table top can be constructed using 2×4 or 2×6 planks, depending on the desired thickness․ Additional materials include 2×4 boards for the lateral braces and center supports․ Wood screws, bolts, and wood glue are essential for securing the joints․ Sandpaper is needed for smoothing the surfaces, and a finish like paint, stain, or sealant protects the wood and enhances its appearance․ Depending on the design, metal brackets or trestle brackets may be used for added reinforcement․ Properly selecting and preparing these materials ensures a durable and visually appealing trestle table․
3․3 Tips for Choosing the Right Lumber
When selecting lumber for your trestle table, prioritize straight, knot-free boards to ensure stability and a professional finish․ Opt for durable wood species like cedar, pine, or oak, depending on your desired aesthetic and durability needs․ Always inspect for warping or cracks, as these can compromise the table’s structural integrity․ For outdoor tables, consider pressure-treated wood to resist rot and insects․ Ensure the lumber is properly dried to avoid shrinkage or movement post-construction․ Measure and cut accurately to minimize waste․ Sand all pieces before assembly to achieve a smooth surface for finishing․ Choosing the right lumber is crucial for both functionality and visual appeal․
Safety Tips and Precautions
Always wear safety goggles and gloves when cutting or drilling lumber․ Ensure proper workshop ventilation and keep loose clothing tied back․ Regularly inspect tools for damage․
4․1 Safety Gear You Must Use
Safety gear is essential when working on trestle table projects․ Always wear safety glasses to protect your eyes from debris․ Use gloves to prevent splinters and ensure a firm grip․ A dust mask is crucial for protecting against sawdust inhalation․ Wear steel-toe boots to safeguard feet from heavy tools or falling objects․ Additionally, consider hearing protection when using loud power tools․ Ensure all tools are in good condition to avoid accidents․ Keep your workspace clean and well-lit to minimize hazards․ Regularly inspect equipment and follow proper operating instructions․ Remember, safety gear is your first line of defense against injuries, making it indispensable for a successful DIY project․
4․2 Common Mistakes to Avoid
When building a trestle table, avoid common mistakes that can compromise its stability and appearance․ One frequent error is incorrect measurements, leading to uneven surfaces or misaligned joints․ Ensure all cuts and drills are precise and double-checked․ Another mistake is insufficient clamping, which can result in joints shifting during assembly․ Always use clamps to hold pieces firmly in place․ Additionally, rushing the assembly can lead to poorly fitted parts․ Take your time to align components correctly․ Lastly, ignoring wood preparation, such as not sanding or planing lumber, can cause a rough finish․ Properly prepare materials to achieve a smooth, professional result․
4․3 Proper Workshop Setup for Safety
A well-organized workshop is essential for safe and efficient trestle table construction․ Always maintain a clean workspace, free from clutter, to minimize tripping hazards and ensure easy access to tools․ Proper lighting is crucial; use bright, even lighting to see your work clearly․ Store tools and materials in designated areas to prevent accidents․ Wear appropriate safety gear, such as safety glasses and a dust mask, when cutting or sanding wood․ Keep power tools away from water and ensure they are properly grounded․ Maintain good ventilation, especially when using paints or stains․ Lastly, keep an emergency kit nearby and ensure clear pathways to exits․ A safe setup promotes focus and prevents mishaps․
Design and Customization Options
Trestle table plans PDFs offer diverse designs, from rustic to modern, allowing customization to suit any decor․ Choose materials, styles, and unique details to create a personalized piece․
5․1 Popular Trestle Table Designs
Popular trestle table designs include rustic, modern, and farmhouse styles, each offering unique aesthetics․ Rustic designs feature distressed wood finishes, while modern designs emphasize clean lines and minimalism․ Farmhouse-style trestle tables often incorporate thick wooden planks and sturdy legs for a classic look․ Many plans also include adjustable or collapsible options for versatility․ Additionally, designs may vary in size, from small coffee tables to large dining tables, catering to different spaces and needs․ These designs often highlight the simplicity and functionality of trestle tables, making them suitable for various settings, from cozy homes to professional workspaces․
5․2 How to Customize Your Trestle Table
Customizing your trestle table allows you to tailor its design to fit your space and style․ Start by choosing the type of wood and finish, such as rustic distressed wood or a sleek modern stain; You can also modify the table’s size, adjusting the length and width to suit your needs․ Adding decorative elements like carved legs or intricate detailing can enhance its visual appeal․ Consider incorporating storage solutions, such as drawers or shelves, for added functionality․ Personalize further with unique hardware or paint colors to match your home decor․ These customizations ensure your trestle table is both functional and visually striking, making it a standout piece in any room․
5․3 Incorporating Unique Details and Styles
Incorporating unique details and styles into your trestle table can elevate its aesthetic and functionality․ Consider adding carved or tapered legs for a vintage look, or use mixed wood species for a contrasting top․ Metallic accents, such as steel brackets or hardware, can add an industrial touch․ For a rustic charm, distress the wood or incorporate reclaimed materials․ Storage solutions like built-in drawers or shelves can enhance practicality․ Custom paint colors or stains allow you to match your table to your home decor․ These unique details ensure your trestle table stands out while maintaining its timeless appeal․ Explore various designs and styles to create a piece that reflects your personal taste and complements your space․

Step-by-Step Building Process
Follow the PDF guide to build your trestle table, starting with preparing materials, constructing legs, attaching supports, assembling the tabletop, and adding the final finish․
6․1 Preparing the Lumber and Materials
Begin by milling and cutting the lumber according to the PDF plans․ Sand all pieces to ensure smooth surfaces and remove splinters․ Organize the materials, such as 4x4s for legs, 2x6s for supports, and 2x4s for the tabletop․ Use a miter saw or circular saw for precise cuts, and a drill press for pre-drilling holes to avoid splitting the wood․ Sort and label each component for easy assembly․ Double-check the cut list to ensure all parts are accounted for before proceeding․ Proper preparation ensures a smooth and efficient building process, reducing errors and saving time during assembly․
6․2 Constructing the Table Legs and Supports
Start by assembling the table legs using 4×4 lumber, ensuring they are square and sturdy․ Attach the top and bottom braces with screws, creating a rigid frame․ Use clamps to hold pieces in place while drilling pilot holes and securing with wood screws․ Next, build the support system between the legs, such as an H-frame or center beam, to add stability and prevent wobbling․ Sand all surfaces to ensure a smooth finish․ Double-check the alignment and levelness of the legs and supports before moving on to the tabletop assembly․ Proper construction of the legs and supports is critical for the table’s stability and durability․
6․3 Assembling the Table Top
Begin by arranging the planks side by side to form the table top, ensuring they are evenly spaced and aligned․ Use clamps to hold the planks securely in place while drilling pilot holes․ Screw the planks together from the underside to avoid visible fasteners․ Sand the edges to ensure a smooth, even surface․ For added stability, attach cross supports between the planks using wood glue and screws․ Double-check the measurements to ensure the tabletop fits perfectly over the legs․ Once assembled, sand the entire surface to achieve a polished finish․ Proper assembly of the tabletop ensures a sturdy and visually appealing final product․
6․4 Adding the Final Touches and Finish
After assembling the table, sand all surfaces to ensure smoothness and evenness․ Apply a finish like stain, varnish, or oil to protect the wood and enhance its appearance․ Follow the manufacturer’s drying instructions between coats․ Inspect the table for any imperfections and address them before applying a final coat․ Ensure all surfaces are even and the finish is consistent for a polished look․ This step is crucial for both aesthetics and durability, completing your trestle table project effectively․

Common Mistakes and Troubleshooting
Common errors include uneven surfaces, warping, and misaligned joints․ Troubleshooting involves correcting alignment issues, using clamps for stability, and ensuring proper drying of finishes to prevent warping and damage․
7․1 Identifying Common Errors in Trestle Table Construction
Common errors in trestle table construction often stem from improper measurements, uneven cutting, and misaligned joints․ Warped or bowed lumber can lead to an unstable table base․ Additionally, failing to pre-drill holes or using incorrect screw lengths may result in split wood․ Inconsistent clamping during assembly can cause surfaces to become uneven, affecting the table’s structural integrity․ Ignoring moisture content in wood can lead to warping after completion․ Lastly, rushing the sanding and finishing process may result in a rough, uneven surface․ Identifying these issues early ensures a sturdy and visually appealing final product․
7․2 How to Fix Warped or Uneven Surfaces
Fixing warped or uneven surfaces in a trestle table requires careful attention to detail; Begin by identifying the source of the warp, such as moisture exposure or uneven drying․ Lightly sand the affected area to smooth out inconsistencies․ For minor warping, applying a wood conditioner or using wood filler can help stabilize the surface․ More severe warps may necessitate disassembling parts and re-gluing them with proper clamping to ensure alignment․ Allow the wood to acclimate to the environment before applying a finish․ Regularly inspecting and addressing issues promptly prevents further damage, ensuring a durable and even tabletop surface for years to come․
7․3 Troubleshooting Joint and Alignment Issues
Joint and alignment issues in trestle tables often arise from improper fitting or uneven surfaces․ Check all connections for snugness and ensure wood pieces are properly aligned․ Use clamps to hold joints in place while glue dries, and verify with a square or level to maintain accuracy․ If joints feel loose, reinforce them with wood screws or dowels․ For misaligned parts, lightly sand edges to achieve a flush fit․ Avoid over-tightening, as this can cause warping․ If issues persist, disassemble and reassemble, ensuring surfaces are clean and dry for optimal adhesion․ Sanding and re-finishing may be necessary to restore a seamless appearance after corrections;
Creative Uses for Your Trestle Table
A trestle table is versatile, serving as a dining area, workbench, or storage solution․ Its sturdy design adapts to various settings, making it a practical and stylish addition to any space․
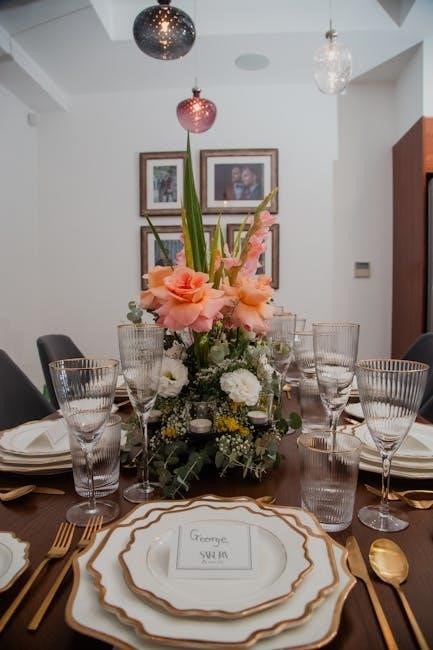
8․1 Using Your Trestle Table for Dining
A trestle table is an excellent choice for dining, offering a classic and elegant appearance that complements any home decor․ Its sturdy construction ensures durability, making it suitable for both casual family meals and formal gatherings․ The open design of the trestle legs allows for ample legroom, creating a comfortable seating arrangement for guests․ Additionally, the table’s surface can be customized with various finishes and styles, such as rustic wood tones or modern painted looks, to match your dining space perfectly․ Whether indoors or outdoors, a trestle dining table adds a touch of timeless sophistication to your dining experience․
8․2 Converting Your Trestle Table into a Workbench
Converting your trestle table into a workbench is a practical way to repurpose it for DIY projects or woodworking tasks․ The sturdy design and open leg structure make it ideal for holding tools and materials․ You can add features like a vice, storage bins, or a pegboard to enhance functionality․ Sanding the surface for a smooth finish or adding a protective coating ensures durability․ This transformation not only saves space but also provides a versatile workspace for various projects․ With minimal modifications, your trestle table can double as a functional workbench, blending practicality with the charm of its original design․
8․3 Incorporating Storage Solutions
Incorporating storage solutions into your trestle table design can maximize functionality while maintaining its elegant appearance․ Adding shelves, drawers, or cabinets beneath the table top creates space for storing tools, linens, or office supplies․ You can also install hooks or bins for organizing smaller items․ For a rustic look, consider open shelving or wicker baskets․ If you prefer a sleeker design, drawers with soft-close mechanisms offer a modern touch․ These storage additions not only enhance practicality but also keep your workspace or dining area clutter-free․ By integrating storage, your trestle table becomes a multifunctional piece that blends seamlessly with any room’s decor․
Trestle table plans PDFs offer a comprehensive guide to crafting functional and stylish tables, blending creativity with practicality for a rewarding DIY experience․
9․1 Final Thoughts on Building a Trestle Table
Building a trestle table is a rewarding DIY project that combines creativity with practicality․ It allows you to craft a functional and stylish piece for your home while honing your woodworking skills․ From measuring and cutting lumber to assembling the final structure, the process is both challenging and fulfilling․ The sense of accomplishment in creating something durable and beautiful is unmatched․ Whether for dining, work, or storage, a trestle table adds timeless charm to any space․ With the right plans and tools, anyone can bring this classic design to life, enjoying the satisfaction of a handmade creation for years to come․
9․2 Encouragement to Start Your DIY Project
Starting your DIY trestle table project is an exciting journey that can transform your ideas into reality․ Don’t hesitate—take the first step and dive into the world of woodworking․ With clear plans and basic tools, you’ll find the process manageable and enjoyable․ Embrace the opportunity to learn new skills and create something meaningful․ Remember, every project begins with a single cut, and the sense of accomplishment you’ll feel is unparalleled․ Overcome any fears and trust the process; your effort will result in a beautiful, functional piece that reflects your creativity․ DIY projects are about growth, and this trestle table is a perfect way to start your creative adventure!
9․3 Resources for Further Learning and Inspiration
For further learning and inspiration, explore online platforms like Rogue Engineer and HowToSpecialist, which offer detailed DIY guides and trestle table plans․ YouTube tutorials and woodworking forums provide invaluable tips and visual demonstrations․ Additionally, websites like Instructables and Pinterest showcase creative designs to spark your imagination․ Consider joining woodworking communities to connect with experienced makers and gain insights․ Don’t forget to check out downloadable PDF plans from trusted sources for precise measurements and instructions․ These resources will help you refine your skills and stay inspired throughout your DIY journey․ Embrace the learning process and enjoy the creative exploration that comes with building your trestle table!