Honeywell T4 Pro Programmable Thermostat: Installation Guide
This comprehensive guide details the installation process for the Honeywell T4 Pro thermostat, covering everything from initial setup to advanced configuration options.
It ensures a smooth and efficient experience, referencing package contents, wiring diagrams, and system compatibility checks for optimal performance.
Furthermore, it provides troubleshooting tips and access to Honeywell Home support, empowering users with the knowledge to resolve any potential issues.
Welcome to enhanced home comfort and energy management! The Honeywell T4 Pro Programmable Thermostat represents a significant advancement in home climate control technology. This thermostat is designed for ease of use, offering intuitive programming and a clear display for optimal user experience.
This guide will walk you through the complete installation process, ensuring a seamless integration with your existing heating and cooling system. The T4 Pro supports a wide range of systems, including conventional forced air, hydronic, and heat pump configurations.
Before beginning, familiarize yourself with the thermostat’s features and capabilities. Understanding its potential will allow you to maximize energy savings and personalize your home’s comfort levels. This manual provides detailed instructions, wiring diagrams, and troubleshooting tips to assist you every step of the way, opening doors to a new world of possibilities.
Package Contents Verification
Before commencing installation, carefully verify the contents of the Honeywell T4 Pro package to ensure all necessary components are present. This step prevents delays and ensures a smooth installation process.
Your package should include: the Honeywell T4 Pro Thermostat unit itself, a mounting baseplate, screws and wall anchors for secure attachment, wire labels for easy identification during wiring, and this comprehensive Installation Guide.
Inspect each item for any signs of damage incurred during shipping. If any components are missing or damaged, do not proceed with the installation. Immediately contact Honeywell Home Support (details in the Specifications & Support section) for replacement parts. Accurate verification now saves potential headaches later, guaranteeing a successful setup and optimal performance of your new thermostat.
Safety Precautions
Prior to beginning the installation of your Honeywell T4 Pro thermostat, please heed these crucial safety precautions. Electrical shock hazard exists – always disconnect power to your heating and cooling system at the breaker box or fuse before commencing any wiring work.
Verify the power is OFF using a non-contact voltage tester. If you are uncomfortable working with electrical wiring, consult a qualified HVAC technician.
Keep the thermostat and its components away from water and excessive humidity. Do not install the thermostat in locations exposed to direct sunlight or extreme temperatures. Always follow local electrical codes during installation. Improper wiring can damage the thermostat and potentially create a fire hazard. Exercise caution and prioritize safety throughout the entire installation process.
Installation Preparation
Before installation, gather necessary tools and confirm your system’s compatibility with the T4 Pro.
Review power options and ensure a safe, efficient setup, preparing for a seamless thermostat integration.
Tools Required for Installation
Ensuring you have the correct tools readily available will streamline the Honeywell T4 Pro installation process. A small, flathead screwdriver is essential for terminal connections and adjustments. A Phillips head screwdriver will be needed for mounting the thermostat baseplate securely to the wall.
Wire strippers are crucial for preparing the thermostat wires, ensuring clean connections without damaging the conductors. A wire connector tool, or wire nuts, will be necessary to safely join wires if required by your system configuration.
A level is vital for ensuring the thermostat is mounted straight, contributing to a professional appearance and accurate temperature sensing. A drill with appropriate drill bits may be needed depending on your wall material. Finally, a voltage tester is highly recommended to verify power is off before working with any wiring, prioritizing safety throughout the installation.
System Compatibility Check
Before beginning the installation, verifying your heating and cooling system’s compatibility with the Honeywell T4 Pro is paramount. The T4 Pro supports a wide range of systems, including forced air (gas, oil, electric), hydronic (hot water baseboard), and heat pumps.
However, it’s crucial to confirm your system’s voltage – the T4 Pro typically operates on 24V systems. Check if you have a common (C) wire; while the T4 Pro can often operate without one using a power stealing method, a C-wire is recommended for optimal performance and feature availability.
Determine if your heat pump is single-stage or two-stage, as wiring configurations differ. If you have a multi-stage system, ensure the T4 Pro supports the number of stages. Finally, consult the Honeywell compatibility checker online or contact support if you’re unsure about your system’s specifications.
Power Options Overview
The Honeywell T4 Pro thermostat offers flexible power options to accommodate various installation scenarios. Traditionally, the thermostat receives power through the 24VAC wiring from your heating and cooling system, requiring a common (C) wire for consistent operation.
However, the T4 Pro is designed to function in systems without a C-wire, utilizing a “power stealing” or “power sharing” technique, drawing minimal power from the heating/cooling circuit. Be aware that this method may limit certain features or cause compatibility issues with some systems.
For optimal performance and to unlock all features, a dedicated C-wire is strongly recommended. If a C-wire isn’t present, consider adding one or utilizing a C-wire adapter kit. Always disconnect power to your HVAC system before working with any wiring.
Wiring the Honeywell T4 Pro
Proper wiring is crucial for correct operation; this section details connecting the thermostat to your HVAC system, utilizing UWP terminal designations for various configurations.
Follow diagrams carefully, ensuring accurate connections for forced air, hydronic, and heat pump systems, prioritizing safety and system compatibility.
UWP Wiring Terminal Designations

Understanding the Universal Wiring Platform (UWP) terminal designations is fundamental for successful installation. The Honeywell T4 Pro utilizes a standardized wiring scheme to accommodate diverse HVAC systems. R typically signifies 24VAC power, while C is the common wire, essential for consistent power supply. W controls heating, Y activates cooling, and G manages the fan.
For heat pump systems, additional terminals come into play: O/B reverses the valve for heating/cooling changeover, and Aux or E provides auxiliary or emergency heat. L often indicates a fault indicator. Carefully identify each wire from your existing thermostat and match it to the corresponding UWP terminal on the T4 Pro backplate. Incorrect wiring can lead to system malfunction or damage, so double-check all connections before proceeding. Refer to the detailed wiring diagrams provided for specific system configurations.
Wiring Conventional Systems (Forced Air)
When wiring a Honeywell T4 Pro to a conventional forced-air system, identify the existing thermostat wires. Typically, you’ll have wires for power (R and C), heating (W), cooling (Y), and the fan (G). Connect the ‘R’ wire to the ‘Rh’ terminal on the T4 Pro backplate if your system uses a single transformer, or to both ‘Rh’ and ‘Rc’ if it has two.
The ‘W’ wire connects to the ‘W1’ terminal for heating, ‘Y’ to ‘Y1’ for cooling, and ‘G’ to ‘G’ for the fan. Ensure the ‘C’ wire is securely connected as it provides continuous power to the thermostat. If a ‘C’ wire isn’t present, a C-wire adapter may be necessary. Double-check all connections against the wiring diagram included with the thermostat. Proper wiring ensures seamless operation of your heating and cooling functions.
Wiring Conventional Systems (Hydronics)
For hydronic (hot water or steam) systems, wiring the Honeywell T4 Pro requires careful attention to the specific system configuration. Identify the wires for power (R and C), heating (W), and potentially a common wire for zone control. Connect the ‘R’ wire to the ‘Rh’ terminal on the thermostat base, and the ‘C’ wire to the ‘C’ terminal for consistent power.
The ‘W’ wire connects to the ‘W1’ terminal to activate the heating system. If your system utilizes a zone valve, ensure the wiring corresponds to the valve’s activation signal. Properly insulate all connections to prevent heat loss and ensure reliable operation. Always consult the system’s wiring diagram and the T4 Pro’s installation guide for accurate connections, and verify power is off before commencing work.
Wiring for Heat Pump Systems (Single-Stage)
Wiring a single-stage heat pump to the Honeywell T4 Pro involves identifying specific terminals for heating (O/B), cooling (Y), and the common wire (C). Connect the ‘Y’ wire to the ‘Y’ terminal to activate the cooling function. The ‘O/B’ wire is crucial; determine if your system uses ‘O’ (heat pump reversing valve energize to cool) or ‘B’ (heat pump reversing valve energize to heat) and connect accordingly.
The ‘R’ wire connects to ‘Rh’, and the ‘C’ wire to ‘C’ for consistent power. Ensure correct ‘O/B’ wire configuration is vital for proper heating and cooling operation. Double-check your heat pump’s wiring diagram before making connections. Isolate power before wiring and verify all connections are secure and insulated for safe and reliable performance.
Wiring for Heat Pump Systems (Two-Stage)
Wiring a two-stage heat pump to the Honeywell T4 Pro requires careful attention to terminal designations. Connect the first-stage cooling wire (Y1) to the ‘Y’ terminal, and the second-stage cooling wire (Y2) to the designated ‘Y2’ terminal.
For heating, connect the first-stage heating wire (O1/B1) to ‘O/B’, and the second-stage heating wire (O2/B2) to the ‘O2/B2’ terminal, ensuring correct ‘O’ or ‘B’ configuration. The common wire (C) remains essential, connecting to the ‘C’ terminal for consistent power. Verify your heat pump’s wiring diagram to confirm correct wire identification.
Proper configuration of the two-stage wires enables efficient and comfortable climate control. Always disconnect power before wiring and ensure secure, insulated connections.
Thermostat Mounting
Securely mounting the Honeywell T4 Pro is crucial for optimal performance and aesthetic integration. This section details the mounting process, including wall plate installation and wiring concealment.
Proper mounting ensures stable operation and a clean, professional appearance within your home environment.
Mounting System Setup
Before physically mounting the Honeywell T4 Pro, careful preparation of the mounting location is essential. Begin by removing the existing thermostat baseplate, clearly labeling all wires before disconnection to avoid confusion during reconnection.
Utilize the included mounting hardware – screws and wall anchors – ensuring they are appropriate for your wall type. For drywall, anchors are typically required. Position the new T4 Pro baseplate, ensuring it’s level for a professional appearance.
Feed the thermostat wires through the opening in the baseplate. Secure the baseplate to the wall using the provided screws, avoiding over-tightening. The Installer Setup (ISU) mode, discussed later, can be accessed during this phase to simplify initial configuration. Double-check wire connections against your labeling before proceeding to attach the thermostat to the baseplate.
Installer Setup (ISU) Mode
The Installer Setup (ISU) mode on the Honeywell T4 Pro streamlines the initial configuration process for professionals and experienced DIYers. To enter ISU mode, typically a specific button combination is pressed during power-up – consult the full manual for the exact sequence.
Within ISU mode, you can configure critical system parameters, such as the system type (forced air, hydronic, heat pump), heating and cooling stages, and fan control settings. This pre-configuration minimizes the need for extensive menu navigation after the thermostat is fully mounted and powered on.
ISU mode also allows for easy wire verification, confirming correct connections before the thermostat is fully operational. Exiting ISU mode saves your settings and returns the thermostat to normal user operation. Proper use of ISU mode significantly reduces installation time and potential errors.
Cover Plate Installation (Optional)
The Honeywell T4 Pro offers an optional cover plate designed to conceal existing wall imperfections or paint differences from previous thermostat installations. This aesthetic enhancement provides a cleaner, more professional appearance.
Installation is straightforward: after mounting the baseplate and completing the wiring, carefully align the cover plate over the base. It typically snaps into place with a secure fit, requiring minimal effort. Ensure the plate is flush against the wall for a seamless look.
The cover plate doesn’t interfere with thermostat functionality or access to controls. It’s a purely cosmetic addition. If desired, the thermostat can be operated without the cover plate, offering flexibility based on your installation needs and aesthetic preferences.

System Configuration
After installation, configure your T4 Pro by setting the date, time, and system type (heating or cooling).
Program personalized temperature schedules to optimize comfort and energy savings, tailoring settings to your lifestyle.
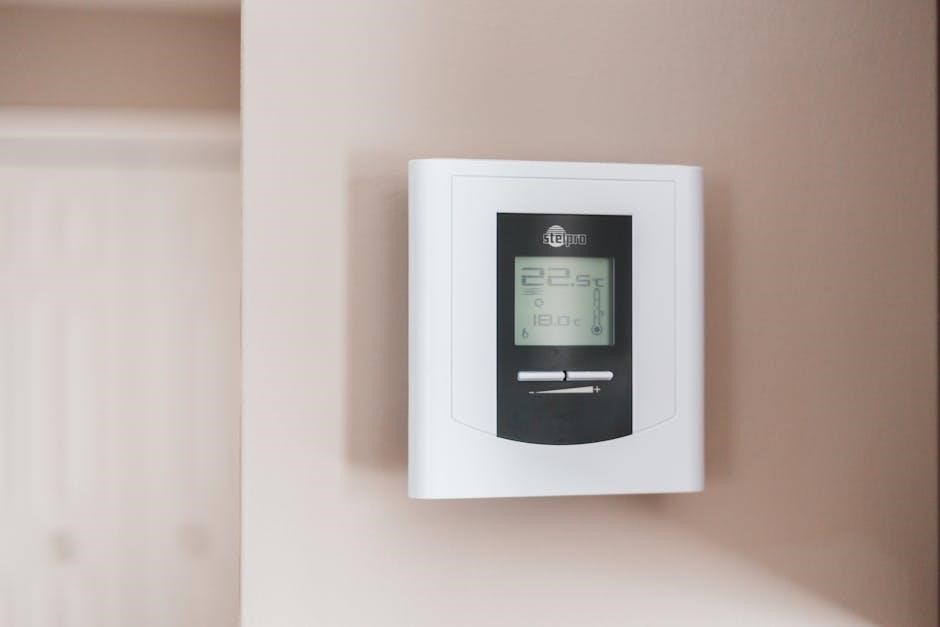
Initial Power-Up and Display
Upon completing the wiring and securing the thermostat, the Honeywell T4 Pro will initiate its power-up sequence. The display should illuminate, presenting the Honeywell Home logo and initiating a self-test. This initial phase verifies the correct connection of the wiring and confirms the thermostat’s operational status.
During the startup process, the display may briefly show scrolling text or diagnostic codes, indicating internal checks. Once the self-test is complete, the thermostat will typically default to a welcome screen or a request for initial configuration settings.
If the display remains blank, double-check the power source (batteries or C-wire connection) and wiring connections. A dimly lit or flickering display may indicate insufficient power. Refer to the troubleshooting section for further assistance. The initial display is crucial for beginning the setup process and ensuring proper functionality.
Setting the Date and Time
After the initial power-up, the Honeywell T4 Pro will prompt you to set the current date and time. Accurate date and time settings are essential for proper scheduling and operation of your heating and cooling system. Navigate through the menu options using the thermostat’s control buttons – typically up, down, left, and right, along with a select or enter button.
The display will guide you through each step, allowing you to adjust the month, day, year, hour, and minute. Confirm each selection by pressing the appropriate button. Ensure you select the correct AM or PM designation for accurate timekeeping.
Incorrect date and time settings can affect programmed schedules and potentially lead to inefficient energy usage; Double-check your entries before finalizing the settings. Once confirmed, the thermostat will store the information and display the current date and time on the main screen.
Configuring System Type (Heating/Cooling)
Following date and time setup, the Honeywell T4 Pro requires configuration of your heating and cooling system type. This step ensures the thermostat correctly controls your equipment. Access the system configuration menu using the thermostat’s control buttons. You’ll be presented with options for various system types, including forced air, hydronic, and heat pump systems.
Carefully select the option that accurately reflects your home’s setup. Incorrect selection can lead to improper operation and potential damage to your HVAC equipment. The thermostat may ask further clarifying questions, such as whether you have conventional or communicating systems.
Confirm your selections and the thermostat will save the configuration. This setting is crucial for the thermostat to understand how to control your heating and cooling effectively, optimizing comfort and energy efficiency.
Programming Temperature Schedules
The Honeywell T4 Pro allows for customized temperature schedules to maximize comfort and energy savings. Access the programming menu through the thermostat’s interface. You can typically set different temperatures for various periods throughout the day – wake, leave, return, and sleep – creating a personalized schedule.
The thermostat often supports separate schedules for weekdays and weekends, accommodating different routines. You can program different temperatures for heating and cooling modes within each period. Explore options for temporary holds, overriding the programmed schedule for specific events or absences.
Review your programmed schedule carefully to ensure it aligns with your lifestyle and preferences. Utilizing schedules effectively can significantly reduce energy consumption and lower utility bills.
Advanced Features & Troubleshooting
Explore electrical ratings, common installation issues, and factory reset procedures. Connecting to the Honeywell Home app unlocks remote control and advanced functionalities for enhanced convenience.
Understanding Electrical Ratings
The Honeywell T4 Pro thermostat operates within specific electrical parameters to ensure safe and reliable performance. It’s crucial to verify your existing system’s voltage and wiring configuration aligns with these ratings before installation. Typically, the T4 Pro supports 24VAC systems, common in most residential heating and cooling setups.
Incorrect voltage can damage the thermostat or the connected HVAC equipment. Pay close attention to the milliamp (mA) ratings for each terminal, particularly those connected to heating, cooling, and fan controls. Exceeding these limits can lead to component failure. The manual details these specifications clearly, often listing maximum and minimum acceptable values.
Always disconnect power at the breaker before working with any wiring. If you are unsure about your system’s electrical characteristics, consult a qualified HVAC technician. Ignoring these precautions could result in electrical shock or damage to your equipment. Proper understanding of these ratings is paramount for a successful and safe installation.
Troubleshooting Common Installation Issues
During Honeywell T4 Pro installation, several issues may arise. A common problem is a thermostat that won’t power on – verify the C-wire connection is secure and receiving 24VAC. If the display is blank, double-check all wiring connections against the wiring diagrams. Incorrect wiring is a frequent cause of operational failures.
Another issue is inaccurate temperature readings. Ensure the thermostat isn’t exposed to direct sunlight or drafts, which can skew results. For heat pump systems, confirm the reversing valve wiring is correct for proper heating and cooling cycles. If the system cycles rapidly, investigate potential short-cycling issues.
Finally, connectivity problems with the Honeywell Home app can occur. Verify your Wi-Fi network is stable and the thermostat is within range. Resetting the thermostat to factory defaults and re-registering it can often resolve these issues. Consult the manual for detailed troubleshooting steps.
Resetting the Thermostat to Factory Defaults
Resetting your Honeywell T4 Pro to factory defaults clears all personalized settings, returning it to its original out-of-box state. This is useful for troubleshooting persistent issues or preparing the thermostat for a new user. The process typically involves navigating through the thermostat’s menu system.
Access the settings menu by pressing the ‘Menu’ button, then locate the ‘Reset’ or ‘Factory Reset’ option. Confirm your choice, as this action is irreversible without re-configuration. The thermostat will power cycle during the reset process.
After the reset, you’ll need to re-establish your Wi-Fi connection (if applicable) and re-configure your system type, date, time, and temperature schedules. Refer to the installation guide for detailed instructions on these steps. A factory reset ensures a clean slate for optimal performance.
Connecting to Honeywell Home App (If Applicable)
The Honeywell Home app enables remote control and monitoring of your T4 Pro thermostat, offering convenience and energy savings. Download the app from the App Store (iOS) or Google Play Store (Android) and create an account.
Ensure your thermostat is connected to a stable 2.4 GHz Wi-Fi network during the pairing process. Within the app, select “Add a Device” and follow the on-screen instructions. The app will guide you through connecting the thermostat to your Honeywell Home account.
You may need to enter a unique code displayed on the thermostat’s screen to complete the connection. Once connected, you can adjust temperature settings, create schedules, and receive alerts from anywhere with an internet connection. Explore the app’s features for enhanced control.
Specifications & Support
This section details the T4 Pro’s technical specifications, including electrical ratings and operating parameters. It also provides comprehensive warranty details and contact information for Honeywell Home support.
Technical Specifications Overview
The Honeywell T4 Pro boasts a wide operating temperature range, typically between 32°F to 104°F (0°C to 40°C), ensuring reliable performance in diverse climates. Its power requirements are 24 VAC, commonly supplied by the heating and cooling system.
The thermostat supports various system types, including forced air, hydronic, and heat pump configurations, with compatibility for single-stage and two-stage systems. Relay contacts are rated for standard HVAC loads, capable of switching heating and cooling equipment effectively.
Display technology utilizes a clear, backlit LCD screen for easy readability, while the internal clock maintains accurate timekeeping. Dimensions are designed for standard wall mounting, and the unit complies with relevant safety and emissions standards. Detailed electrical ratings are crucial for proper wiring and system integration, preventing damage or malfunction.
Warranty Information
Honeywell Home provides a limited warranty for the T4 Pro Programmable Thermostat, safeguarding against manufacturing defects in materials and workmanship. Typically, this warranty covers a period of one year from the date of original purchase, offering peace of mind to consumers.
The warranty’s scope includes repair or replacement of the defective unit, at Honeywell’s discretion. However, it does not cover damage resulting from improper installation, misuse, abuse, or unauthorized modifications. Proof of purchase is essential for warranty claims, so retain your receipt or invoice.
Warranty service is generally provided through authorized Honeywell service centers. For detailed warranty terms and conditions, including exclusions and limitations, refer to the official warranty documentation included with the product or available on the Honeywell Home website. Registering your thermostat online may extend certain benefits.
Contacting Honeywell Home Support
For assistance with your Honeywell T4 Pro thermostat, Honeywell Home offers multiple support channels. Their dedicated support website provides a wealth of resources, including FAQs, troubleshooting guides, and downloadable manuals. You can access it at the official Honeywell Home website.
Direct phone support is also available, allowing you to speak with a knowledgeable representative. The phone number for Honeywell Home Support can be found on their website or in the product documentation. Live chat support is often offered, providing real-time assistance through online messaging.
Additionally, the Honeywell Home community forum is a valuable resource for connecting with other users and sharing experiences. Social media channels, such as Facebook and Twitter, may also provide support and updates. Ensure you have your model number and purchase date readily available when contacting support.