
The Nikon FG is a versatile 35mm SLR camera known for its durability and ease of use, offering modes like Program, Aperture-Priority, and Manual. Designed for both professionals and enthusiasts, it features a built-in light meter and compatibility with Nikkor lenses; This manual provides detailed guidance on mastering its features, ensuring optimal performance in various shooting conditions.
1.1 Overview of the Nikon FG Camera
The Nikon FG is a 35mm single-lens reflex (SLR) camera designed for both professional photographers and enthusiasts. Known for its simplicity and durability, it features a built-in light meter, multiple shooting modes, and compatibility with a wide range of Nikkor lenses. The camera offers Program (P), Aperture-Priority (A), and Manual (M) modes, providing flexibility for various shooting conditions. Its intuitive design makes it accessible to beginners while catering to advanced photographers seeking precise control. This manual serves as a comprehensive guide to understanding the camera’s features, ensuring users can maximize its potential and troubleshoot common issues effectively.
1.2 Importance of the Instruction Manual
The instruction manual is essential for understanding and maximizing the potential of the Nikon FG camera. It provides detailed explanations of the camera’s features, shooting modes, and accessories, ensuring users can operate the camera effectively. The manual covers troubleshooting, maintenance, and advanced techniques, serving as a comprehensive guide for photographers of all skill levels. By following the manual, users can optimize their photography experience, resolve common issues, and explore creative possibilities. It is a vital resource for anyone seeking to master the Nikon FG and achieve the best results in various photographic situations.

Camera Components and Nomenclature
The Nikon FG features a durable design with key components like the lens mount, viewfinder, shutter button, and mode dial. Internal parts include the mirror and shutter mechanism.
2;1 External Parts of the Nikon FG
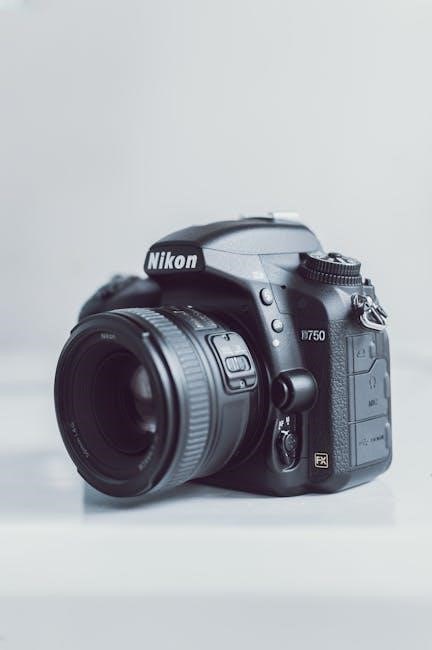
The Nikon FG features a compact and ergonomic design with key external components. The lens mount supports Nikkor lenses, while the viewfinder includes a focusing screen for precise composition. The mode dial allows selection of shooting modes, and the shutter button enables smooth operation. The film advance lever is designed for easy winding, and the ASA/ISO dial adjusts film sensitivity. Additional features include a hot shoe for flash units and a tripod socket for stable mounting. These components ensure intuitive control and versatility for photographers of all skill levels. The camera’s durable build and user-friendly layout make it a reliable tool for capturing high-quality images.
2.2 Internal Components and Their Functions
The Nikon FG’s internal components are designed for precise operation. The shutter mechanism ensures accurate exposure control, while the light metering system uses a silicon photocell for reliable measurements. The exposure control circuitry handles aperture, shutter speed, and film speed calculations. The film transport system includes a motor-free design, relying on manual advancement. These components work together to deliver consistent results across various shooting conditions. Understanding these internal functions enhances the photographer’s ability to utilize the camera effectively, ensuring optimal performance in both automatic and manual modes. The integration of these elements makes the Nikon FG a reliable choice for capturing high-quality images with precision and ease.

Loading Film into the Nikon FG
Loading film into the Nikon FG involves opening the camera back, aligning the film with the spool, and advancing it to the first frame. Ensure the film is properly seated and the back is closed securely to avoid exposure. Always handle film in low-light conditions to prevent fogging. After loading, advance the film to the first frame using the film advance lever. This process ensures the camera is ready for shooting with minimal risk of film damage or exposure issues.
3.1 Removing the Battery Clip
To remove the battery clip on the Nikon FG, locate it on the bottom of the camera. Slide the clip open by moving it in the direction indicated. Gently lift the clip to access the battery compartment. Handle the batteries carefully to avoid damage or corrosion. Removing the battery clip is essential before installing new batteries or replacing the existing ones. Ensure the clip is securely stored to prevent misplacement. This step is crucial for maintaining the camera’s functionality and ensuring proper power delivery. Always handle the battery compartment with care to avoid any potential damage to the camera’s internal components.
3.2 Installing the Battery or Batteries
To install the battery or batteries in the Nikon FG, ensure the camera is turned off. Open the battery compartment by sliding the battery clip downward. Insert the recommended lithium or alkaline batteries, aligning the positive terminal with the marked direction in the compartment. Gently push the batteries into place until they click securely. Close the battery clip firmly to ensure proper contact. Avoid touching the battery terminals to prevent corrosion. Correct installation is crucial for powering the camera’s metering system and electronic functions. Always use the specified battery type to maintain optimal performance and avoid potential damage to the camera’s internal circuitry.
3.3 Replacing the Battery Clip
Replacing the battery clip on the Nikon FG is essential for maintaining proper battery connection. First, ensure the camera is turned off and all batteries are removed. Locate the battery compartment and gently pull out the existing clip. Inspect the compartment for any debris or corrosion and clean it if necessary. Take the new battery clip and align it with the compartment’s guides. Secure the clip firmly by sliding it back into place until it clicks. Ensure the clip is properly seated to maintain reliable battery contact. Avoid forcing the clip, as this could damage the camera’s internal mechanism. A secure battery clip ensures consistent power supply for the camera’s functions.
3.4 Loading Film into the Camera
Loading film into the Nikon FG ensures proper functionality and image capture. Begin by setting the ASA/ISO film speed dial to match the film being used. Open the film door by pulling the release latch located on the bottom of the camera. Carefully remove the film cartridge from its packaging and place it into the film chamber, ensuring the film leader aligns with the red dot on the take-up spool. Gently close the film door until it clicks, securing the cartridge in place. Advance the film by turning the film advance lever until the first frame is loaded. The frame counter will reset to “1,” indicating the camera is ready to shoot. Always handle film in low-light conditions to prevent exposure.

Focusing and Metering Modes
The Nikon FG offers precise focusing and metering options, including manual focus and built-in light metering. Use the aperture ring and shutter dial for exposure control, ensuring accurate results in various lighting conditions. The camera’s metering system provides reliable readings, while the match-needle system simplifies manual adjustments. This combination allows for creative control and optimal image capture.
4.1 Manual Focusing Techniques
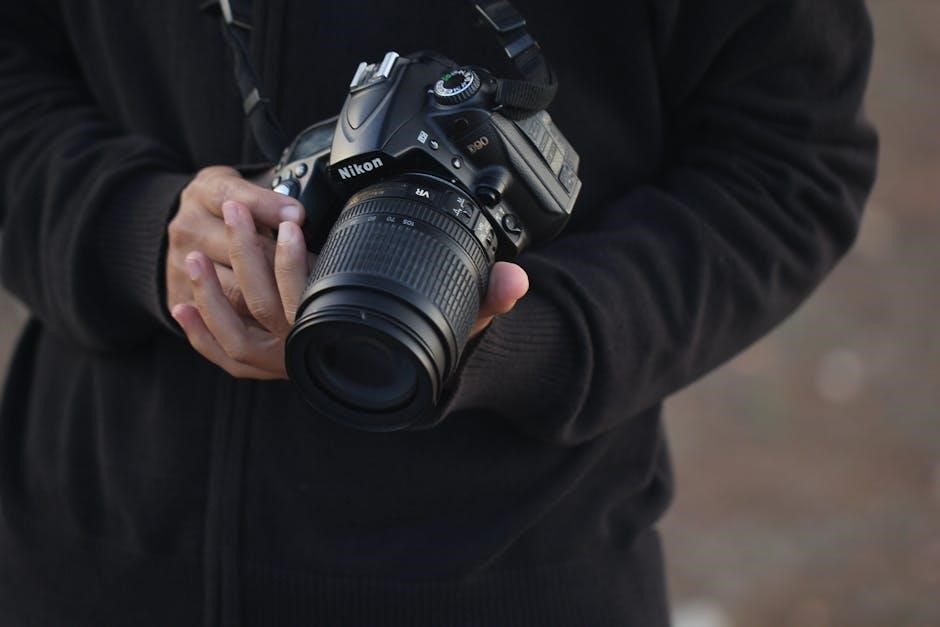
Manual focusing on the Nikon FG is achieved using the focusing ring on the lens, allowing precise control over image sharpness. Align the subject within the viewfinder’s focusing screen, using the split-image prism or microprism collar for accuracy. Rotate the focusing ring until the subject is sharp, ensuring proper focus for clear results. For optimal performance, use the camera’s built-in light meter to adjust aperture and shutter speed accordingly. Manual focusing requires patience but offers creative control, especially in low-light conditions or when autofocus is unavailable. Practice this technique to master sharpness and composition in your photography.
4.2 Using the Built-in Light Meter
The Nikon FG features a built-in light meter to help achieve accurate exposures. To use it, set the film speed using the ASA/ISO dial on the camera’s top. In manual mode, adjust the aperture and shutter speed until the meter’s needle aligns with the center mark. In aperture-priority mode, set the desired aperture, and the camera will automatically adjust the shutter speed based on the meter’s reading. Ensure the meter is activated by lightly pressing the shutter release. The meter provides precise exposure control, allowing for creative adjustments while maintaining optimal image quality. This feature is essential for mastering manual photography techniques.
4.3 Aperture-Priority and Manual Modes
The Nikon FG offers Aperture-Priority (A) and Manual (M) modes for precise control over exposures. In Aperture-Priority mode, set the desired aperture, and the camera automatically adjusts the shutter speed based on the built-in light meter. This mode is ideal for controlling depth of field while ensuring proper exposure. In Manual mode, both aperture and shutter speed can be set independently, offering full creative control. Use the light meter to guide adjustments, aligning the needle for optimal results. Exposure compensation may be needed for challenging lighting conditions. These modes cater to photographers seeking advanced control over their images, making the Nikon FG versatile for various creative needs.
Shooting Modes
The Nikon FG features three shooting modes: Program, Aperture-Priority, and Manual. Program mode offers automatic settings, while Aperture-Priority and Manual modes provide advanced control for precise exposures, ensuring flexibility and ease of use.
5.1 Program Mode (P)
Program Mode (P) on the Nikon FG offers automatic exposure control, allowing photographers to capture images with minimal effort. The camera selects both aperture and shutter speed, ensuring balanced exposures in various lighting conditions. This mode is ideal for beginners or quick shooting scenarios. It provides ease of use while maintaining Nikon’s precision, making it a versatile option for casual and professional photography alike. Program Mode is a convenient feature that simplifies the shooting process while delivering high-quality results, making it a popular choice among users of the Nikon FG camera.
5.2 Aperture-Priority Mode (A)
Aperture-Priority Mode (A) on the Nikon FG allows photographers to set the desired aperture, while the camera automatically adjusts the shutter speed to achieve optimal exposure. This mode is particularly useful for controlling depth of field, enabling creative control over the sharpness of the image. By manually selecting the aperture, users can prioritize subjects or backgrounds, ensuring the desired aesthetic. The camera then calculates the appropriate shutter speed, simplifying the process while maintaining artistic control. This mode is ideal for photographers who want to manipulate the visual elements of their images without the complexity of manual settings.
5.3 Manual Mode
Manual Mode on the Nikon FG offers full control over both aperture and shutter speed, allowing photographers to customize exposure settings for precise results. This mode is ideal for experienced users who prefer creative control, especially in challenging lighting conditions. By manually adjusting the aperture and shutter speed, photographers can achieve specific effects, such as controlling depth of field or capturing motion. The built-in light meter assists in determining the correct exposure, but the user must set the aperture and shutter speed accordingly. Manual Mode is perfect for those who want absolute control over their camera settings to produce unique and tailored images.

Exposure Compensation and Control
Exposure compensation and control are essential for achieving desired results in various lighting conditions. The Nikon FG allows precise adjustments to balance exposures, ensuring optimal image quality.
6.1 Adjusting ASA/ISO Film Speed
Adjusting the ASA/ISO film speed on the Nikon FG is crucial for optimizing exposure settings. The camera allows you to manually set the film speed according to your needs, ensuring compatibility with various film stocks. This feature provides flexibility in different lighting conditions, enabling photographers to achieve consistent results. By accurately setting the ASA/ISO value, you can ensure that the built-in light meter delivers precise readings, leading to well-exposed images. This manual adjustment is a fundamental step in mastering the camera’s exposure control capabilities, making it essential for photographers to understand and utilize effectively in their shooting process.
6.2 Exposure Compensation Techniques
Exposure compensation on the Nikon FG allows photographers to fine-tune their exposures by adjusting the ASA/ISO dial, ensuring optimal results in challenging lighting conditions. This technique is particularly useful for capturing scenes with high contrast or unique lighting setups. By manually overriding the default settings, users can achieve more creative control over their images, enhancing both highlights and shadows. The camera’s design makes it straightforward to apply exposure compensation, providing a reliable method to refine exposures without compromising image quality. This feature is indispensable for photographers seeking precise control over their work, making it a key aspect of the Nikon FG’s functionality and versatility in various shooting scenarios.
Flash Photography
The Nikon FG supports Speedlight flash units, enabling enhanced low-light photography; Sync modes and flash compensation ensure balanced exposures, providing versatility for various lighting conditions and creative control.
7.1 Using Speedlight Flash with Nikon FG
For effective flash photography, the Nikon FG is compatible with Nikon Speedlight flashes. Mount the flash on the hot shoe, ensuring it clicks securely into place. Turn the camera and flash on, and set the flash mode according to your needs. In Program mode, the camera automatically adjusts flash power for balanced exposures. For manual control, set the desired aperture and shutter speed, then adjust the flash output. The built-in light meter helps achieve accurate exposures. Always refer to the Speedlight manual for specific settings and synchronization options. This setup enhances creativity in low-light conditions and provides professional results. Proper synchronization ensures optimal performance and image quality.
7.2 Sync Modes and Flash Compensation
The Nikon FG supports various flash synchronization modes to enhance creativity. Front-Curtain Sync is ideal for capturing sharp images with natural motion blur. Slow Sync combines flash with ambient light for balanced exposures. Rear-Curtain Sync creates artistic effects by lighting trailing subjects. Flash compensation adjusts output, ensuring proper exposure. Use the ASA/ISO dial to fine-tune settings. For optimal results, pair with Nikon Speedlight flashes like the SB-80DX. The hot shoe ensures reliable connectivity. Experiment with sync modes and compensation to achieve desired effects; Refer to the Speedlight manual for compatibility and advanced techniques. Proper synchronization and compensation are key to professional-quality flash photography with the Nikon FG.
Close-Up and Macro Photography
Explore intricate details with the Nikon FG using teleconverters or extension rings for high-magnification shots. Proper lighting and flash synchronization enhance clarity, capturing stunning macro results effortlessly.
8.1 Techniques for Close-Up Shooting
Mastering close-up photography with the Nikon FG involves precision and the right techniques. For stunning results, use a wide aperture like f/2.8 to create a shallow depth of field, isolating your subject. Ensure your lens focuses accurately, and consider manual focusing for greater control. Proper lighting is crucial; natural light or a external flash can enhance details. Experiment with angles to add depth, and use a tripod for stability. The built-in light meter will help achieve perfect exposure. By combining these methods, you can capture sharp, high-contrast images that highlight even the smallest details with exceptional clarity and artistic appeal.
8.2 Using Teleconverters and Extensions
Teleconverters and extension tubes enhance the Nikon FG’s macro capabilities by increasing focal length and magnification. Teleconverters, like the Nikon TC-201 or TC-14B, multiply the lens’s focal length, allowing closer capture of small details. Extension tubes, such as the Nikon PN-11, physically extend the lens-to-sensor distance, enabling extreme close-ups without additional glass. Both accessories maintain image quality while expanding creative possibilities. However, they may reduce aperture and affect metering accuracy. For optimal results, use high-quality accessories and ensure compatibility with your Nikkor lenses. These tools are indispensable for macro photography, offering precise control over subject magnification and composition, while preserving the FG’s legendary optical clarity and sharpness.
Accessories for the Nikon FG
The Nikon FG supports a wide range of accessories, including Nikkor lenses, filters, teleconverters, and Speedlight flash units, enhancing functionality and creative possibilities.
9.1 Compatible Lenses and Accessories
The Nikon FG is compatible with a wide range of Nikkor lenses, including standard, wide-angle, telephoto, and macro options. These lenses are designed to optimize image quality and versatility. Additionally, the camera supports various accessories such as filters, teleconverters, and extension rings, which expand its capabilities for close-up and macro photography. The Nikon Speedlight flash system is also compatible, offering advanced flash control for professional results. These accessories enhance the camera’s functionality, enabling photographers to explore diverse creative possibilities and achieve precise control over their images in different shooting conditions.
9.2 Using Filters and Other Attachments
Filters and attachments enhance creativity and functionality with the Nikon FG. UV filters protect lenses and reduce haze, while polarizing filters minimize glare and enhance colors. Color graduated filters add artistic effects. Lens hoods prevent vignetting and shield the lens from damage. Teleconverters extend focal length for telephoto photography, and extension rings enable close-up shots. These accessories expand the camera’s versatility, allowing photographers to achieve unique effects and adapt to various shooting scenarios. Properly attaching and using these accessories ensures optimal image quality and creative control, making them invaluable tools for both amateur and professional photographers using the Nikon FG.

Maintenance and Troubleshooting
Regular cleaning of the camera and lenses prevents damage. Lubricate moving parts occasionally for smooth operation. Inspect light seals and mirror for wear; Address common issues promptly to avoid malfunctions and ensure optimal performance. Professional servicing is recommended for complex repairs.
10.1 Cleaning the Camera and Lenses
Regular cleaning is essential to maintain the Nikon FG’s performance. Use a soft, dry cloth to wipe the camera body and exterior surfaces. For the lenses, gently remove dust with a microfiber cloth or a lens brush. Avoid harsh chemicals or abrasive materials that could damage coatings. Moisten a lens tissue with distilled water only if necessary, and wipe in a circular motion. Clean the viewfinder and mirror with a soft, dry cloth to prevent smudges. Inspect the camera and lenses regularly for signs of wear or damage. Proper maintenance ensures sharp images and optimal functionality. Clean your equipment in a dry, dust-free environment for best results.
10.2 Common Issues and Solutions
The Nikon FG may experience issues like inaccurate metering or battery drain. Check the ASA/ISO settings if metering is off. Clean the light meter sensor gently with a soft cloth. For battery problems, ensure proper installation or replace with fresh LR44 cells. If the shutter fails to fire, check the battery and ensure the camera is in manual mode. Lens fogging can occur in humid conditions; allow the camera to acclimate. For jammed film, rewind and reload carefully. Regular cleaning prevents dust buildup. Consult the manual or a professional for complex repairs. Addressing these issues ensures optimal performance and longevity of your Nikon FG camera.

Advanced Techniques
Master multiple exposures and bracketing for creative results. Use the ASA/ISO dial for precise exposure control in manual mode. Experiment with long exposures and teleconverters for unique effects.
11.1 Multiple Exposure Techniques
The Nikon FG allows photographers to create unique multiple exposure images. To achieve this, use the multiple exposure lever located on the camera’s bottom. Set the lever to enable multiple shots on a single frame. Shoot your first image, then advance the film without winding it completely. Capture the second image, and reset the lever. This technique combines two exposures on one frame for artistic effects. Adjust aperture and film speed as needed for balanced results. Practice this method to master creative overlays and layered compositions, enhancing your photography with distinctive, multi-layered imagery.
11.2 Bracketing and Long Exposure Shooting
Bracketing on the Nikon FG allows photographers to capture a series of exposures at varying settings, ensuring optimal results in challenging lighting. Use the aperture-priority or manual mode for precise control. For long exposures, set the shutter speed to “B” or use a cable release to minimize camera shake. Adjust the ASA/ISO film speed dial to compensate for light conditions. Long exposures are ideal for capturing motion blur or nightscapes. Use a tripod for stability and experiment with different durations to achieve desired effects. Bracketing and long exposures require patience but offer creative freedom to capture dynamic and atmospheric imagery with the Nikon FG.
The Nikon FG combines simplicity with advanced features, making it ideal for both professionals and enthusiasts. Its durability and versatility ensure timeless photography experiences, encouraging continuous creative exploration and mastery.
12.1 Summary of Key Features
The Nikon FG is a high-quality 35mm SLR camera offering Program, Aperture-Priority, and Manual modes. It features a built-in light meter, ASA/ISO film speed adjustment, and compatibility with Nikkor lenses. The camera supports multiple shooting techniques, including close-up and macro photography with teleconverters. Its durable design ensures long-lasting performance, while the intuitive interface makes it accessible for both professionals and enthusiasts. The FG also supports flash photography with Nikon Speedlight systems, enhancing versatility in various lighting conditions. With its comprehensive manual, users can master advanced techniques like multiple exposures and long exposures, making it a versatile tool for creative photography. Its timeless design and functionality continue to inspire photographers today.
12.2 Encouragement for Further Practice
Mastering the Nikon FG requires patience and dedication, but the rewards are immense. Experiment with different modes, such as Program, Aperture-Priority, and Manual, to understand their unique benefits. Practice focusing techniques, explore flash photography, and delve into close-up and macro shooting. Regular practice will help you capture stunning images with precision and creativity. Don’t hesitate to try new techniques, as the FG’s versatility allows for endless experimentation. Keep shooting, and you’ll soon unlock the full potential of this iconic camera. Remember, every shot brings you closer to mastering the art of photography with the Nikon FG.